Set up a Stripe webhook so customer events arrive in real time
Illustrated walkthrough for merchants to add a Stripe webhook so customer charges and subscriptions sync to Deskwoot in real time.
Updated June 2, 2026Also available in: Deutsch, Português
Without a webhook, Deskwoot pulls your Stripe customer data once every 4 hours through a background sync. A customer who paid 2 minutes ago and then opens your live chat to ask about that order may not show up in the conversation sidebar yet, and the AI bot will not see the order either.
Adding a webhook closes that gap. Stripe pushes events to Deskwoot the moment they happen on your account. This guide walks you through every click with screenshots from the actual Stripe Dashboard.
Step 1: Copy your Webhook URL from Deskwoot
Open Settings → Integrations → Stripe in Deskwoot. The Stripe integration card shows your personal Webhook URL. It looks like https://deskwoot.com/api/webhooks/stripe-customer/<your-integration-id>. Click the copy button next to it.
Step 2: Open the Stripe Webhooks page
Log in to dashboard.stripe.com. In the bottom-left corner click Developers, then click Webhooks in the popup.
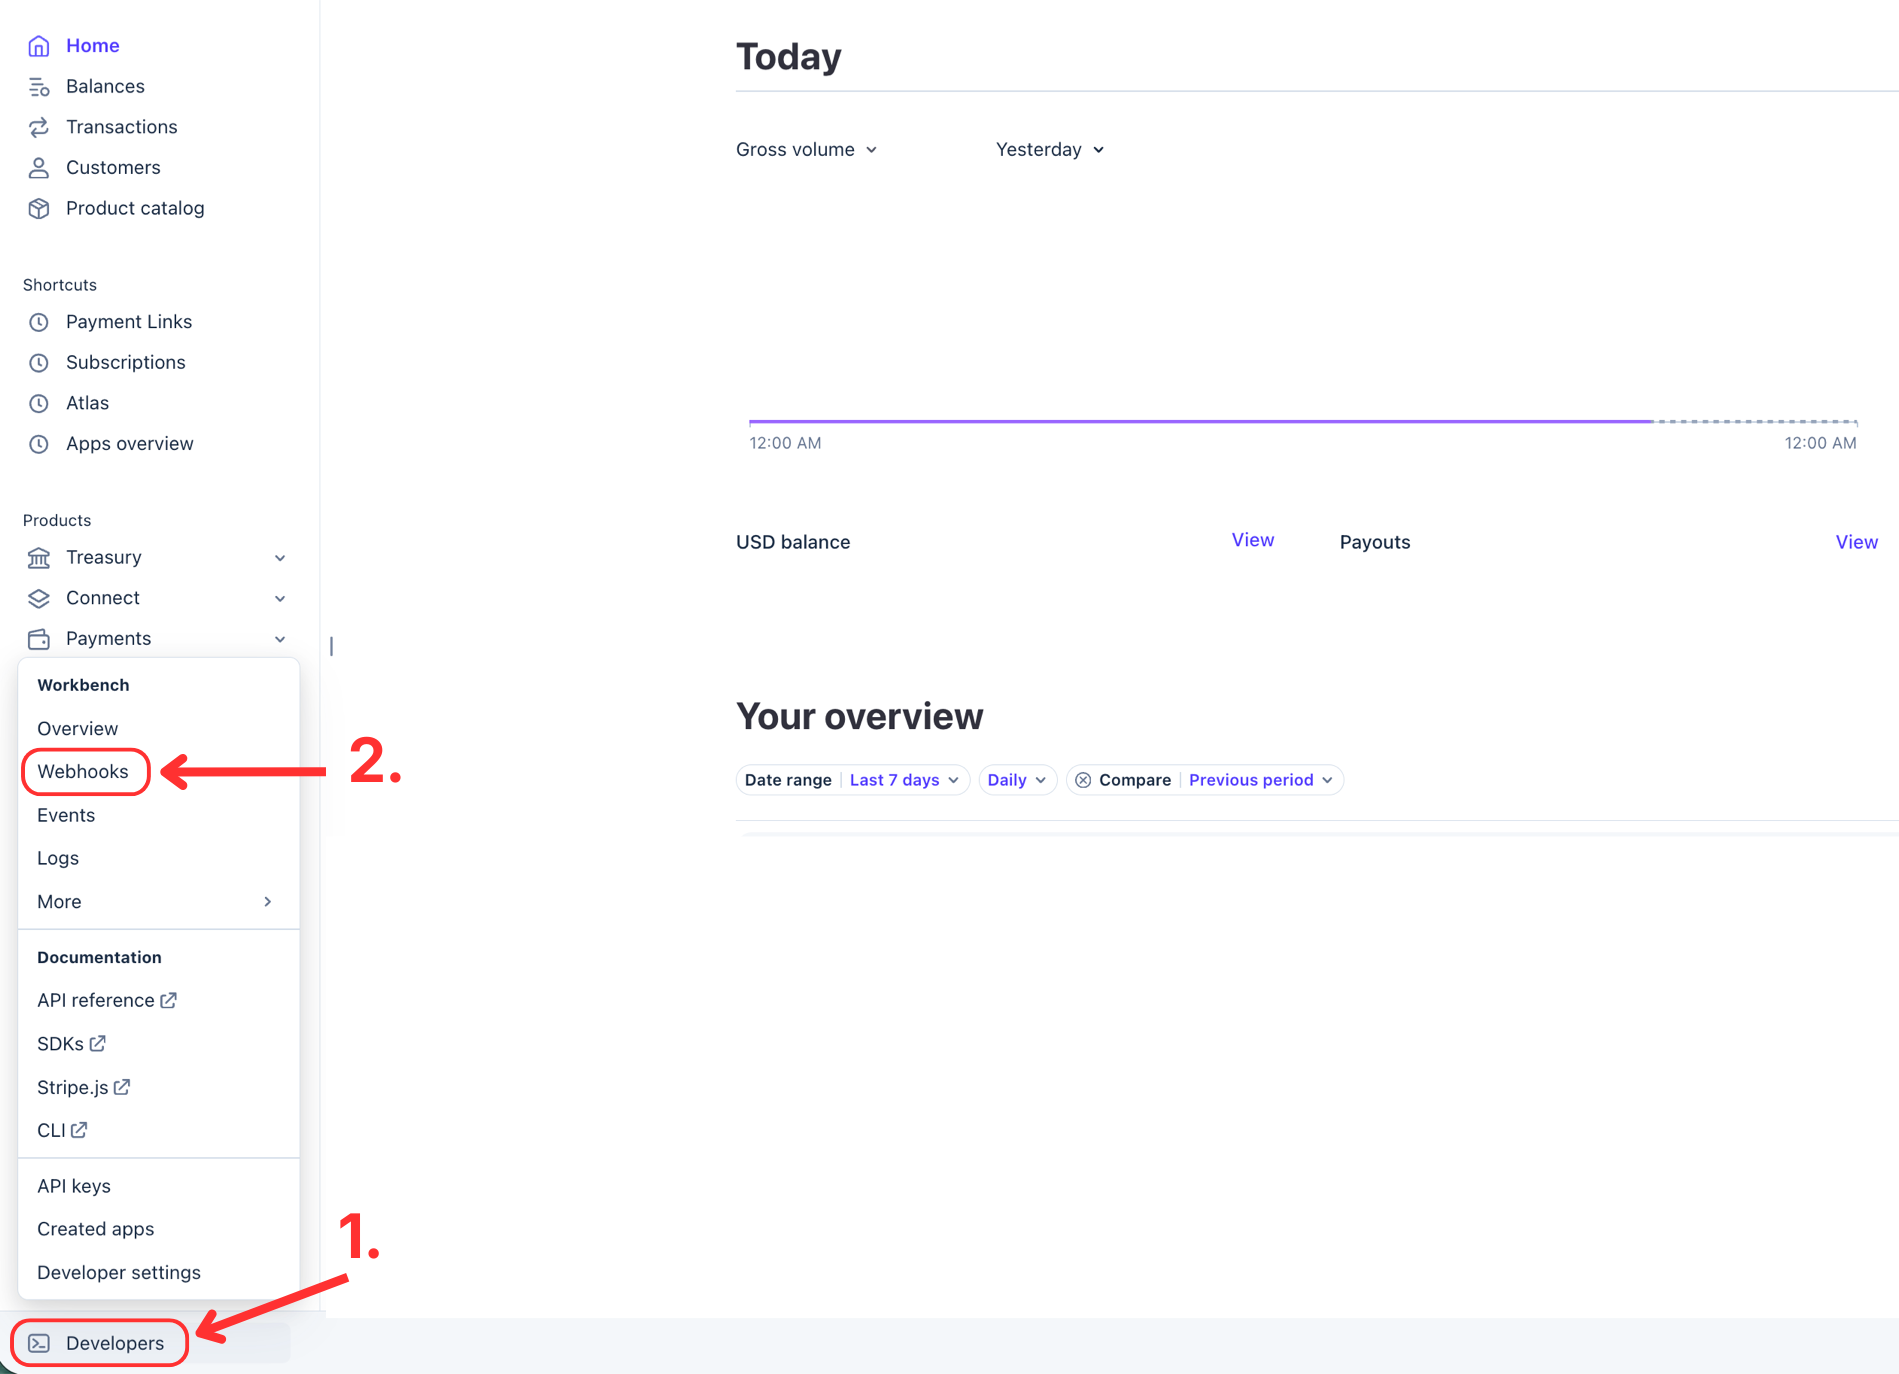
Step 3: Add a destination and select the 8 events
On the Webhooks page click Add destination. In the wizard:
- Leave Event destination scope on Your account.
- Switch to the All events tab.
- In the search field find and check each of these 8 events:
charge.succeededcharge.refundedcustomer.createdcustomer.updatedcustomer.subscription.createdcustomer.subscription.updatedcustomer.subscription.deletedinvoice.paid
- Leave the API version on the Stripe default. Click Continue.
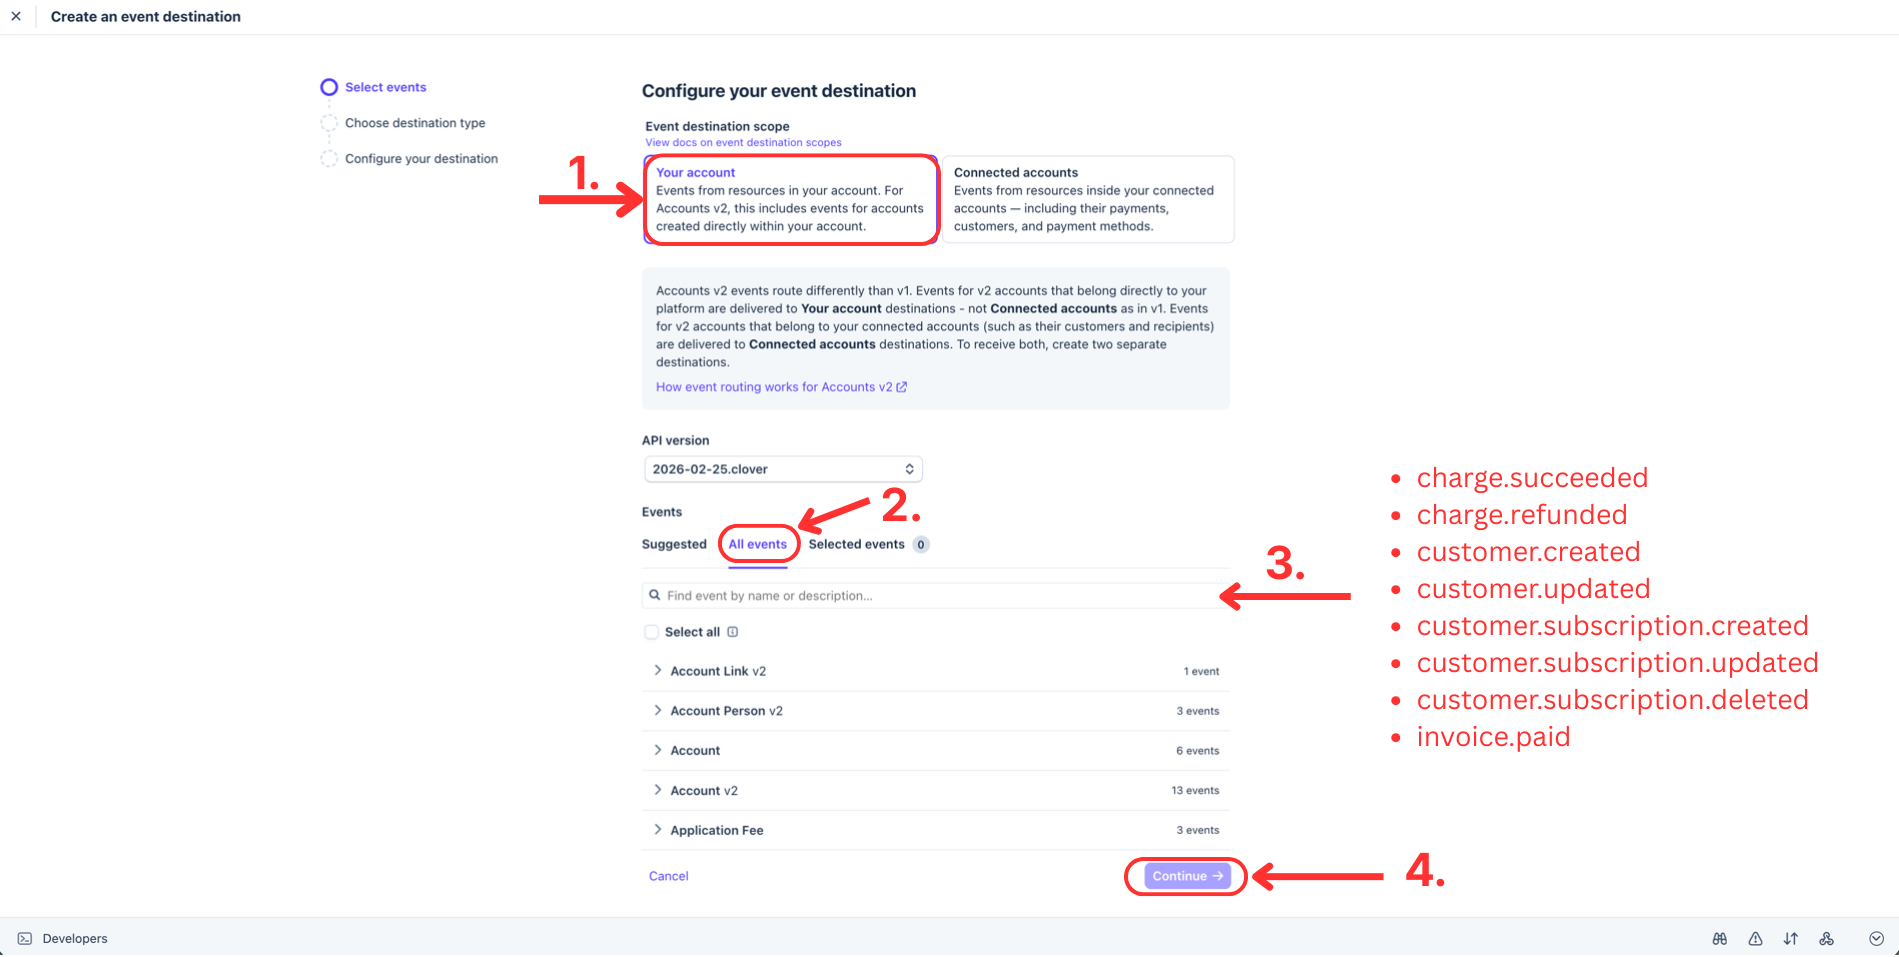
Step 4: Choose the destination type
Pick Webhook endpoint (it is usually pre-selected for you) and click Continue.
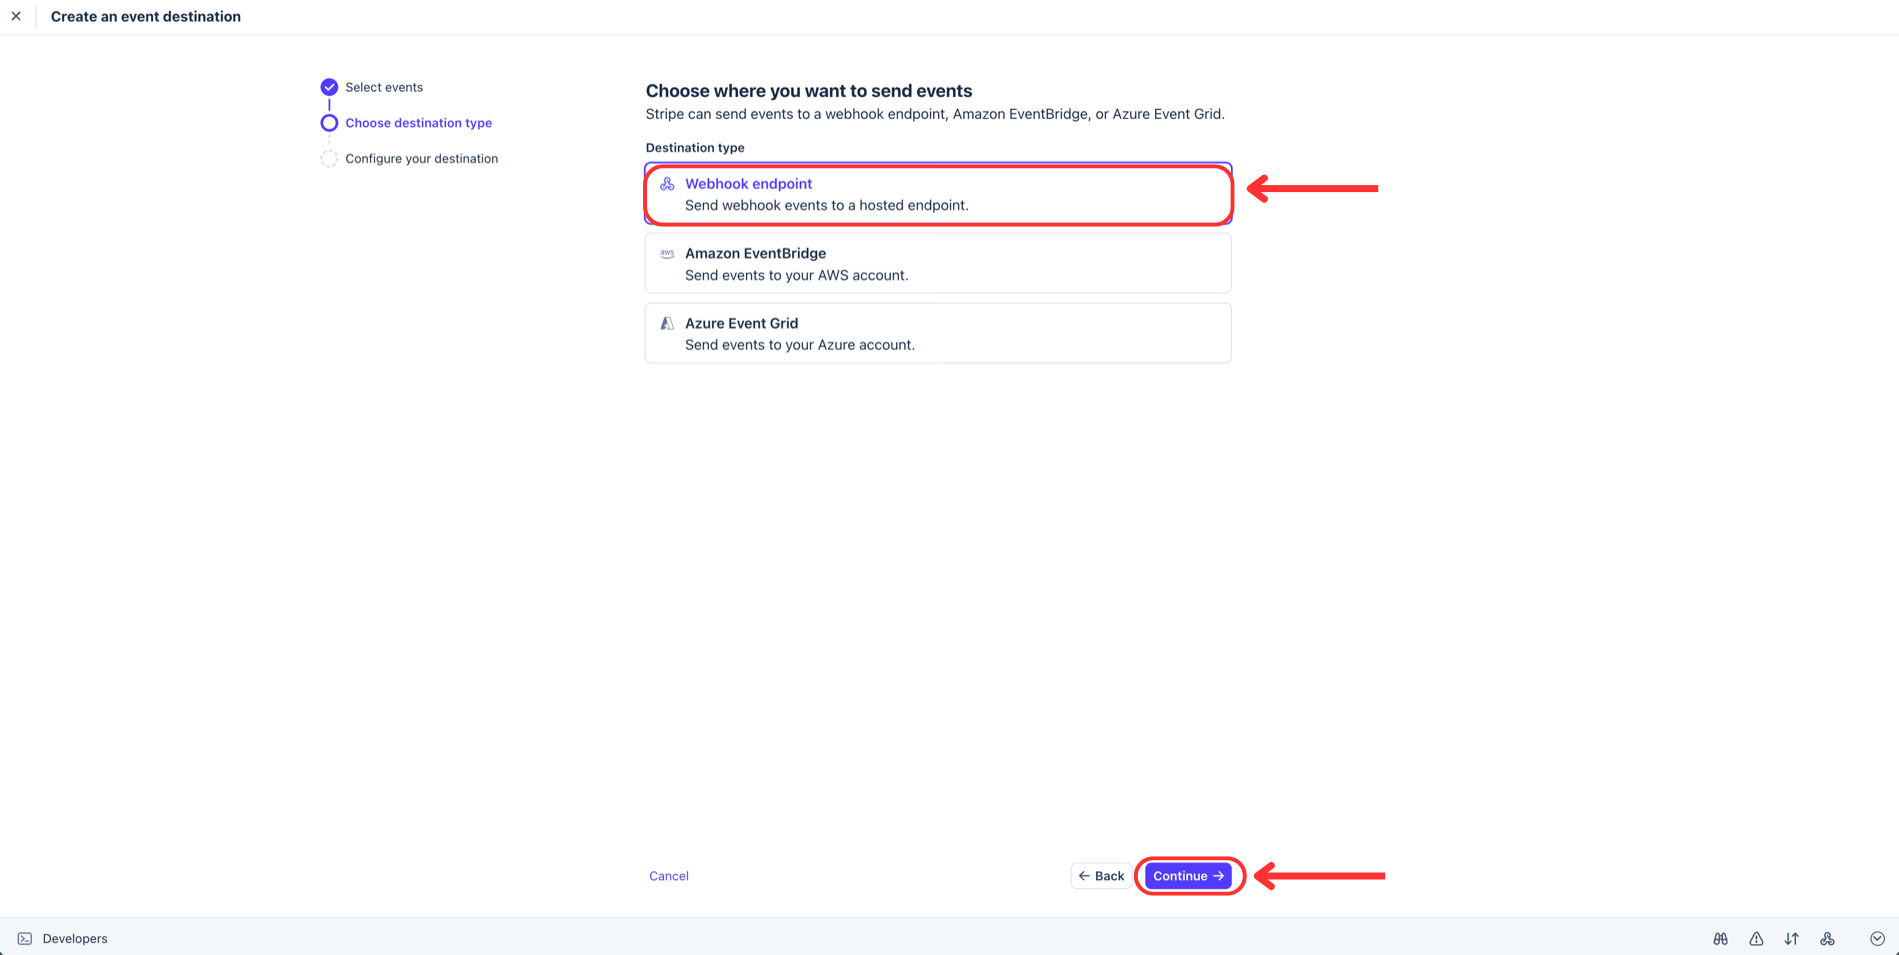
Step 5: Configure the destination
Type Deskwoot as the Destination name, paste the Webhook URL you copied in Step 1 into the Endpoint URL field, and click Create destination. The description is optional.
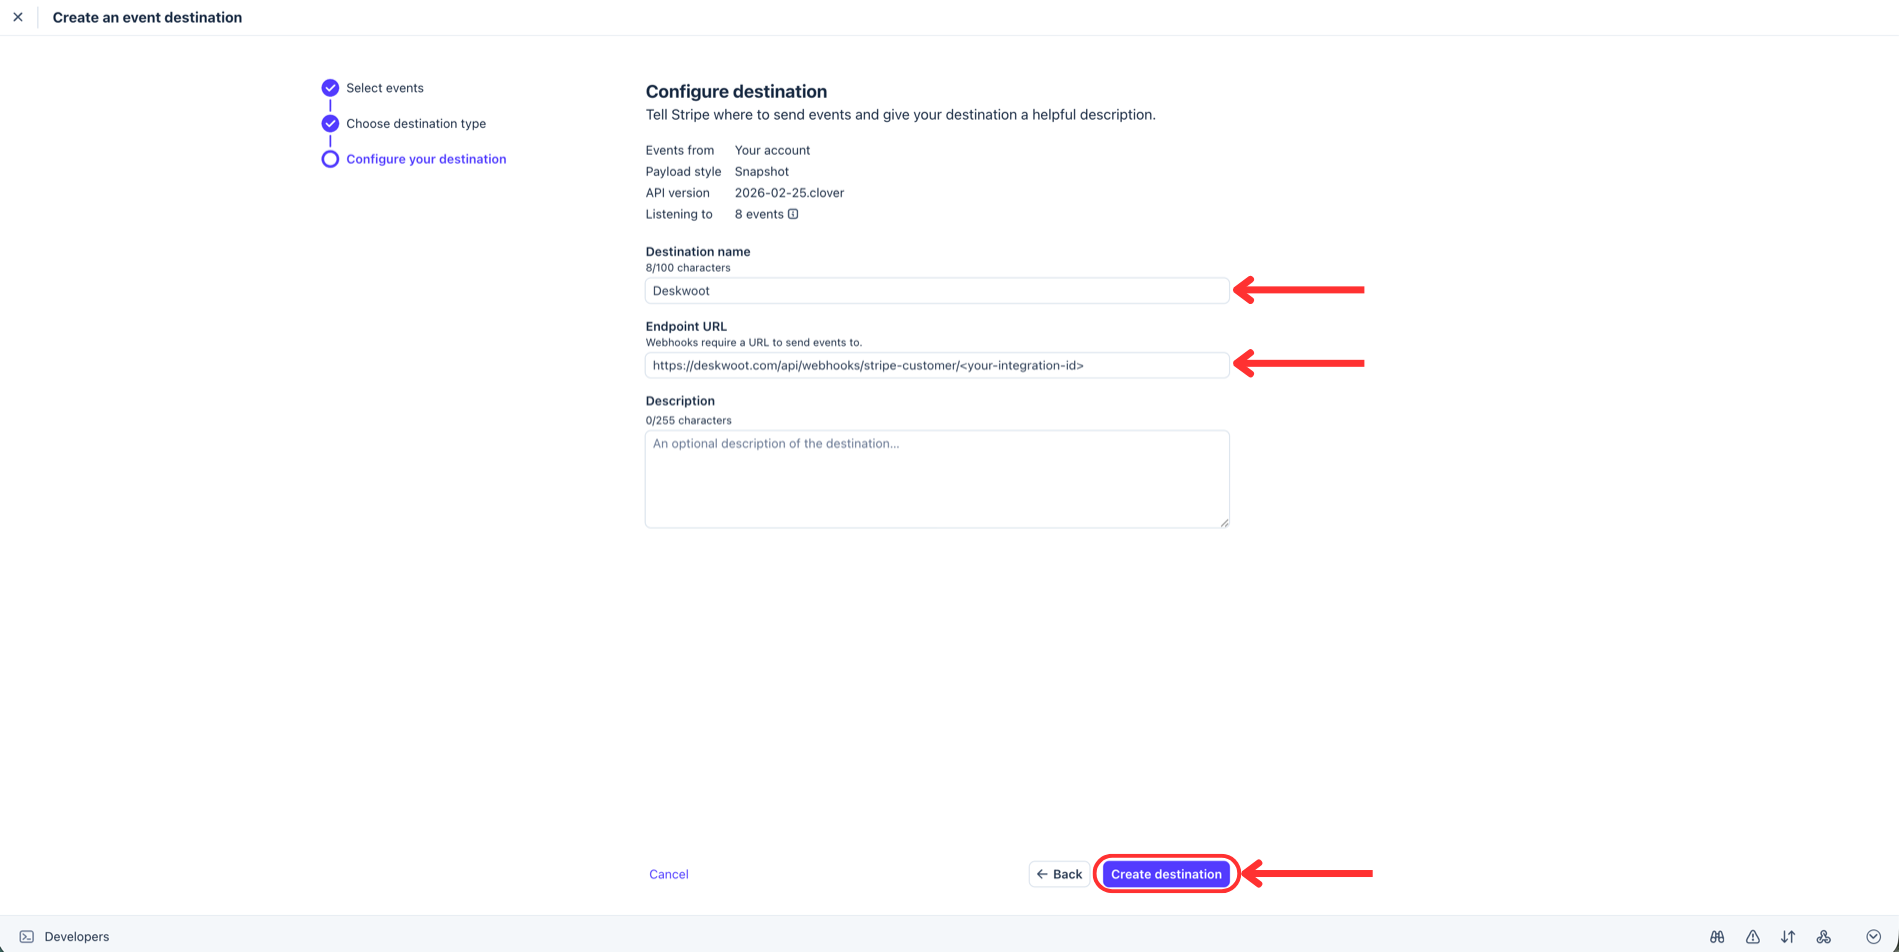
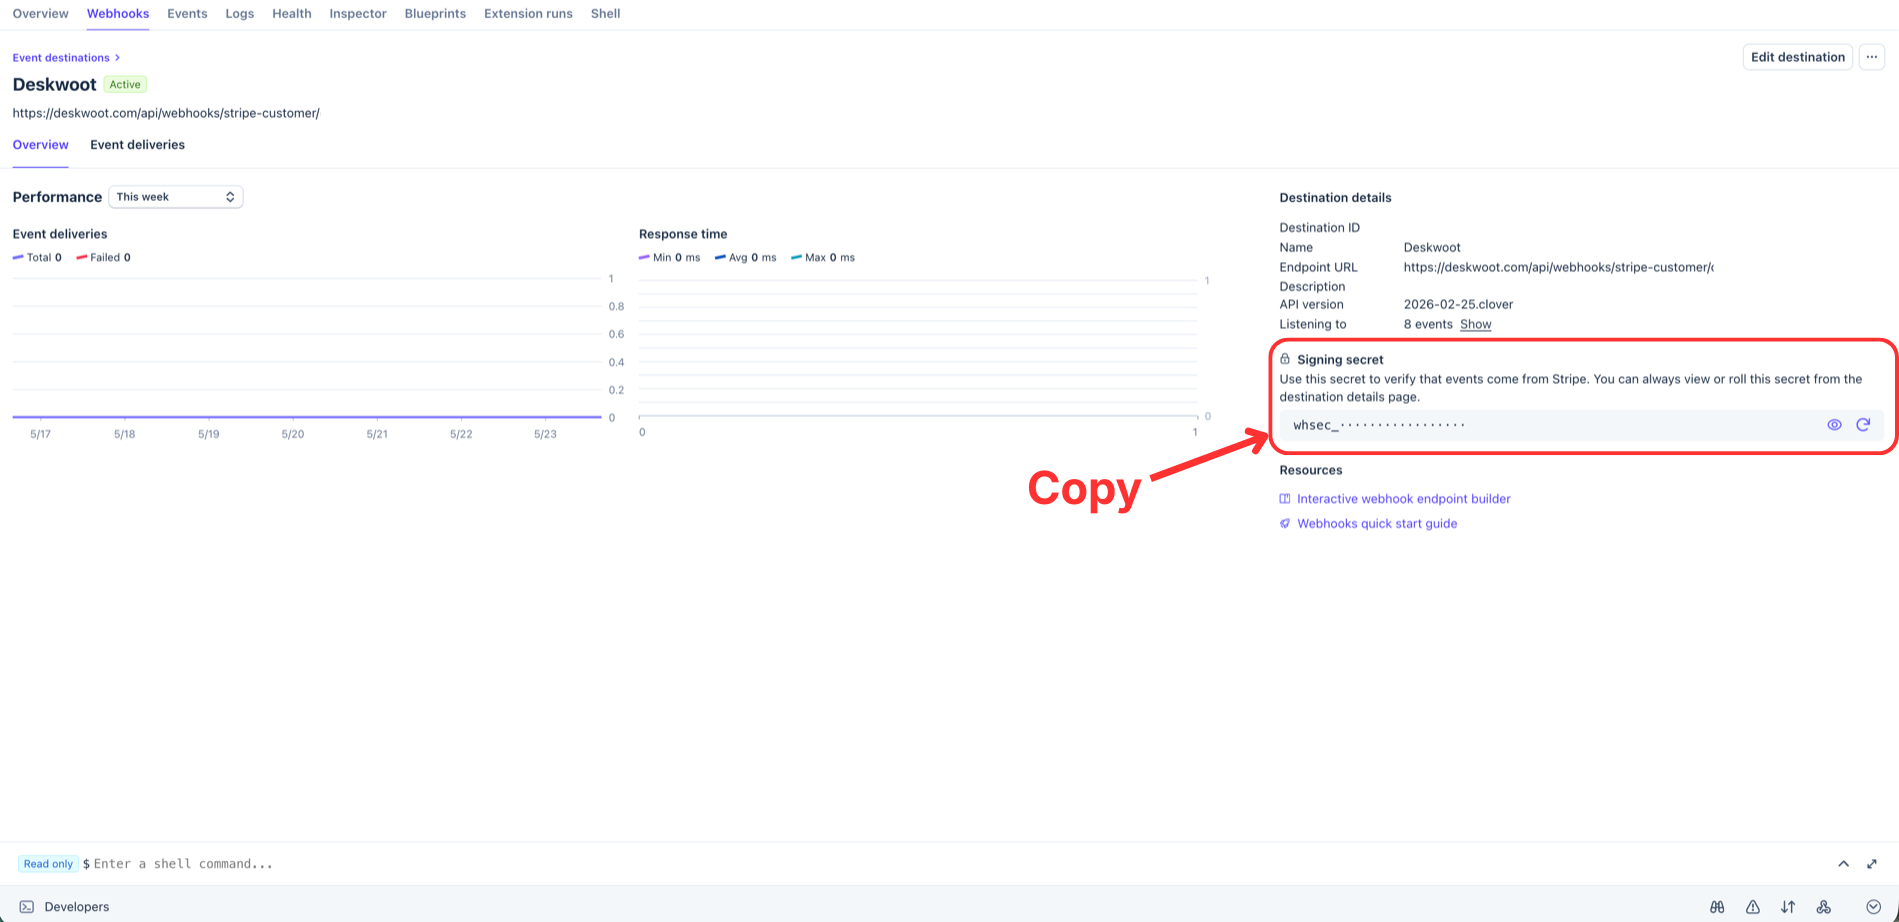
Step 6: Reveal and copy the signing secret
Stripe now shows the newly created webhook endpoint with an Active badge. In the right column find the Signing secret box, click the eye icon to reveal it, and copy the whsec_ value.
Step 7: Paste the secret back into Deskwoot
Back in Deskwoot under Settings → Integrations → Stripe, paste the whsec_ value into the Webhook signing secret field and click Save. The integration card status flips to "Connected".
Step 8: Send a test webhook
Back on the Stripe webhook endpoint page, click Send test webhook. Pick charge.succeeded from the dropdown and click Send test webhook. Within a few seconds Stripe shows a 200 response next to the test event. You're done.
Live chat agents and the AI bot will now see new charges, refunds, and subscription changes the moment they hit Stripe instead of waiting for the next sync cycle.
Troubleshooting
The test webhook returns a 4xx error. Open Deskwoot under Settings → Integrations → Stripe and confirm the signing secret matches exactly what Stripe showed you, no leading or trailing spaces. The secret must match for signature verification to succeed.
The endpoint shows a 412 Precondition Failed. Deskwoot has the integration but no signing secret saved yet. Paste the whsec_ value into the Webhook signing secret field and save.
Events arrive but customers still do not appear in Deskwoot. Most likely the events you selected do not include charge.succeeded or customer.created. Open the webhook endpoint in Stripe, click Update details, and confirm the full event list above is selected.